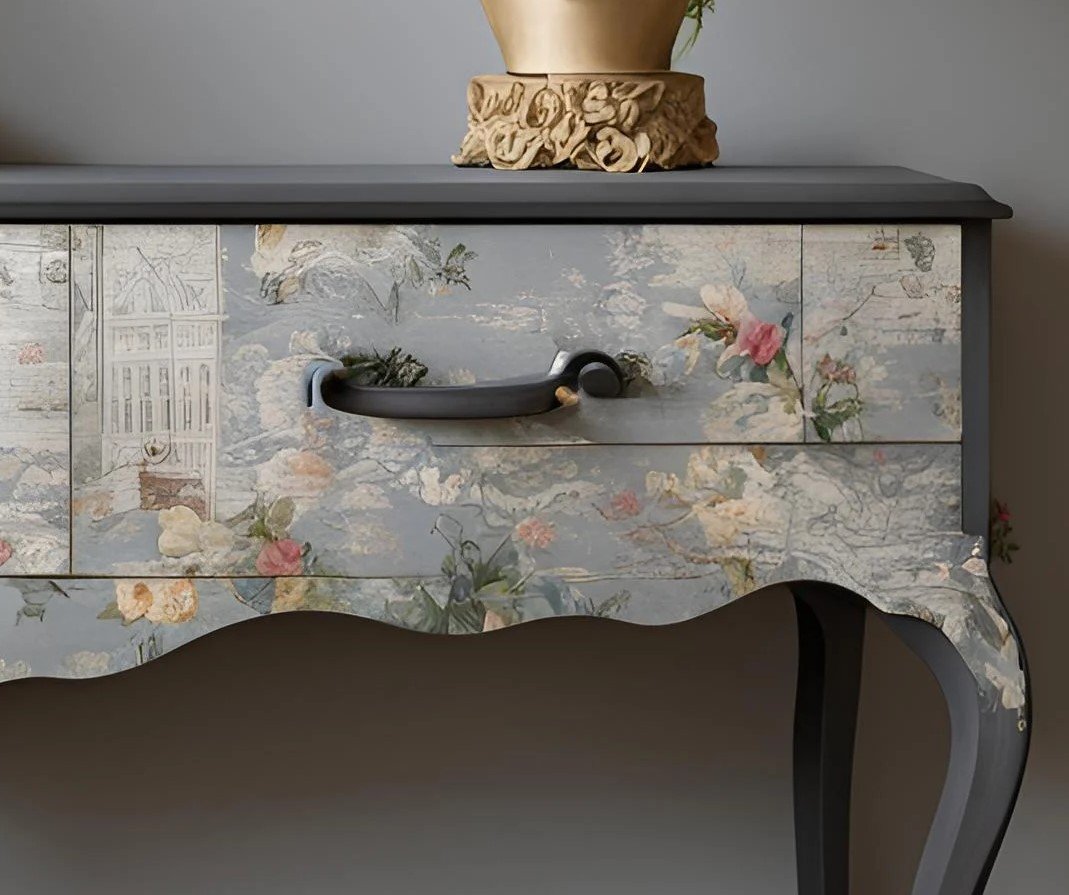
Decoupage is a delightful and creative way to breathe new life into old furniture. This versatile technique involves applying decorative paper or fabric to surfaces, then sealing them with a clear finish. Whether you’re looking to add a touch of whimsy to a tired dresser or give a modern twist to a vintage table, decoupage offers endless possibilities. In this blog post, we’ll explore the basics of decoupage, the materials you’ll need, and some tips to get you started.
What is Decoupage?
Decoupage, derived from the French word “découper” meaning “to cut out,” is an art form that dates back to the 18th century. It involves cutting out pictures or patterns from paper or fabric and adhering them to a surface using glue or a decoupage medium. Once applied, the design is sealed with multiple layers of varnish or clear coat, creating a smooth, durable finish.
Materials You’ll Need
To begin your decoupage project, gather the following materials:
- Decoupage Medium: Mod Podge is a popular choice, but any glue that dries clear will work.
- Decorative Paper or Fabric: Choose patterns that complement your furniture and personal style.
- Scissors or Craft Knife: For cutting out your designs.
- Brushes or Sponges: For applying the decoupage medium and varnish.
- Clear Varnish or Sealant: To protect your finished design.
- Sandpaper: For prepping the furniture surface.
Explore our complete range of products here
Step-by-Step Guide
- Prepare Your Furniture: Clean the surface thoroughly and sand it lightly to ensure the decoupage medium adheres well. Remove any hardware or knobs.
- Cut Out Your Designs: Carefully cut out the images or patterns you want to use. Arrange them on your furniture to plan your design.
- Apply the Decoupage Medium: Brush a layer of decoupage medium onto the furniture where you want to place your cutouts. Press the paper or fabric onto the surface, smoothing out any bubbles or wrinkles.
- Seal the Design: Once all your cutouts are in place, brush another layer of decoupage medium over the entire surface. Allow it to dry completely, then apply additional layers for durability.
- Finish with Varnish: After the decoupage medium is fully dry, apply a clear varnish or sealant to protect your design and give it a polished look.
Here are some more “Decorating ideas from our chief interior decorator“
Tips for Success
- Choose the Right Paper: Thinner papers, like tissue paper or napkins, are easier to work with and less likely to wrinkle.
- Work in Sections: If you’re covering a large area, work in small sections to prevent the medium from drying before you can apply your cutouts.
- Be Patient: Allow each layer of decoupage medium and varnish to dry completely before applying the next to avoid smudging or bubbling.
Creative Ideas
Decoupage can be used on a variety of furniture pieces, from small items like picture frames and trays to larger projects like dressers and tables. Here are some ideas to inspire you:
- Vintage Maps: Use old maps to create a travel-themed piece.
- Floral Patterns: Add a touch of nature with botanical prints.
- Book Pages: Give a literary twist by decoupaging pages from your favorite books.
Decoupage is a fantastic way to personalize your furniture and make it uniquely yours. With a bit of creativity and patience, you can transform any piece into a stunning work of art.

